

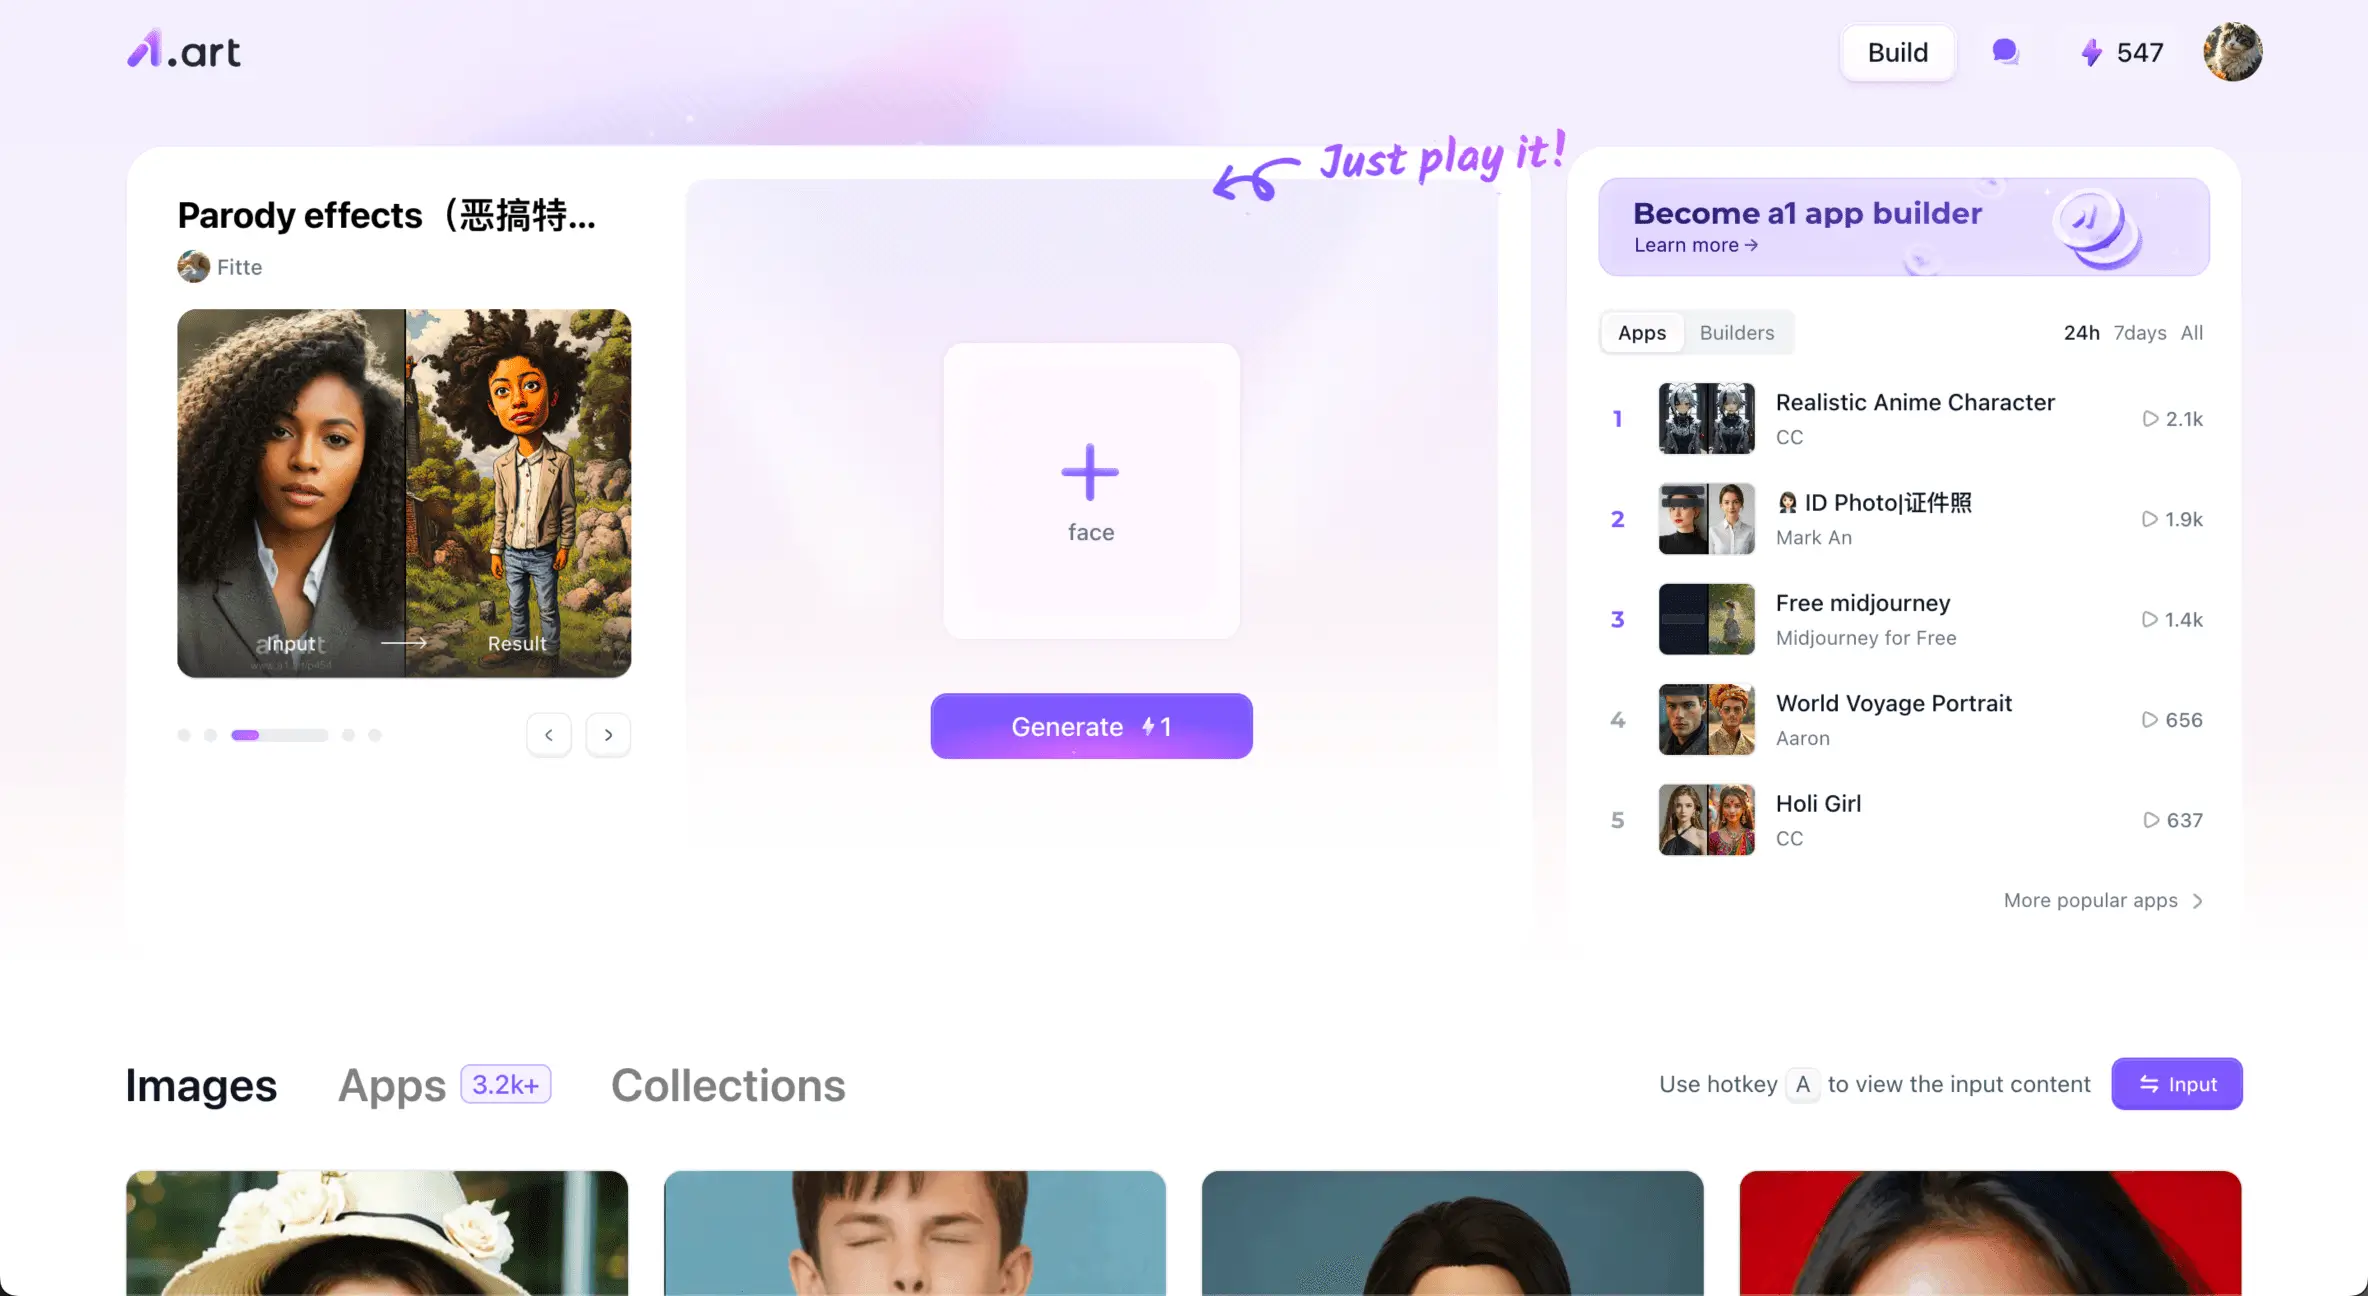
You want a beautiful double-exposure portrait, but the results often look flat or messy. Your face disappears, and the background clashes. It is frustrating when basic editing tools ruin your outline and turn your photo into a dark, confusing blur.
A dedicated AI double-exposure portrait generator respects the classic rules of double-exposure photography while doing the heavy lifting for you.
In this guide, I will show you how to fix muddy blending and create flawless double exposure images. Using smart filters, you can generate pristine artwork in seconds.
Start your art journey with a1.art.
Key Takeaways
-
A double-exposure portrait blends two images into a single image. You merge a dark human shape with a bright, vivid texture, such as a forest or an ocean.
-
For stunning double-exposure images, always start with a bright space behind your subject. A sharp outline keeps the blend clean and clear.
-
a1.art uses incredible tech to offer templates that handle tricky opacity settings.
-
Always read the privacy terms before uploading your face to an AI double exposure portrait generator. Protecting your personal data is just as important as making great art.
What is Double Exposure?
The double-exposure technique dates back to classic film photography. Photographers would expose the same piece of film twice. The dark, unexposed shadows of a person would absorb the bright light of a second image.
Today, digital software uses this logic. Instead of wasting expensive rolls of film, modern AI tools for double exposure film photography use layers and masks to merge scenes.
Here is what makes a beautiful double exposure photo:
-
You start with a strong, solid human silhouette against a bright background.
-
You fill that dark shape with vibrant trees, city lights, ocean waves, or blooming flowers.
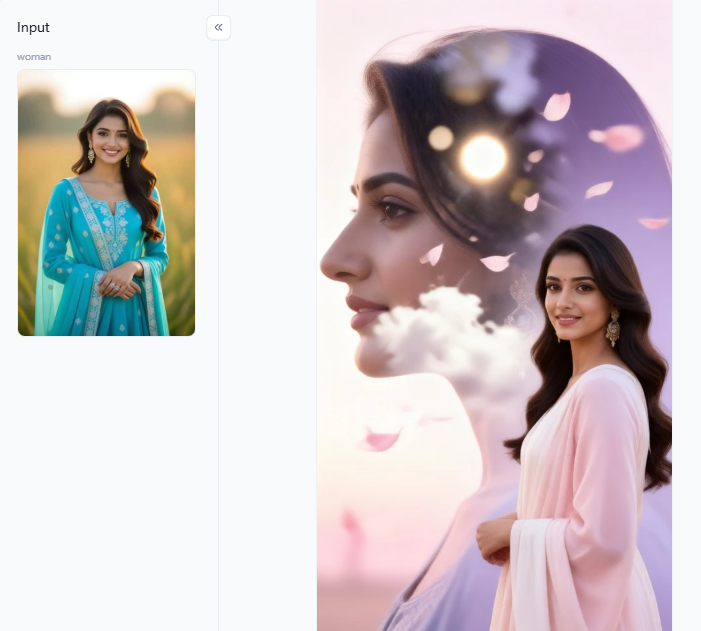
The real magic comes from contrast. One image conveys the physical form, and the second conveys the emotional story. Whether you want to create a striking profile picture or a moody poster, this method turns two normal photos into living artwork.
How to Use It, Just 3 Steps:
Using a1.art is incredibly simple. Here’s the full beginner-friendly guide:
Step1:
Open a1.art, choose the App that you are interested in, then click 「Run」
Click on the image to experience the same App👇
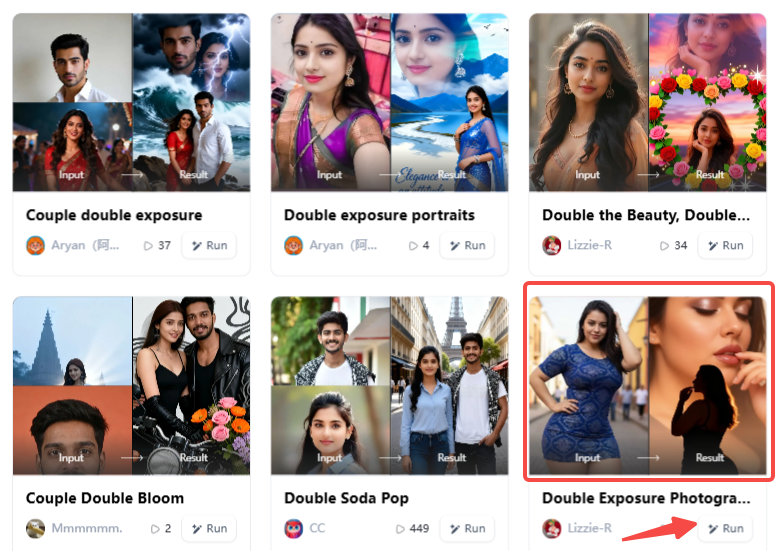
Step2:
Upload a photo/image
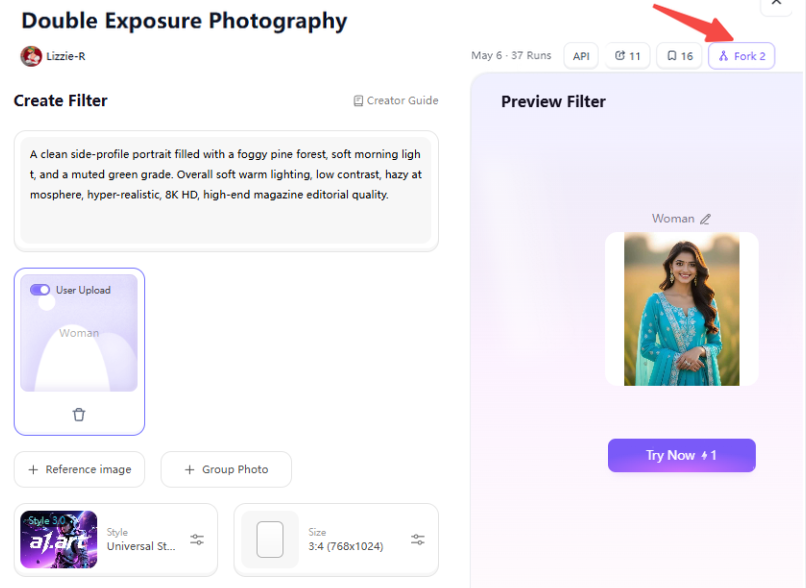
Step3:
Wait 3 seconds, you will get a wonderful result 👇

Is Double Exposure Worth Playing With?
Absolutely. Double exposure makes one photo do two jobs at once. It captures your physical identity while broadcasting a deep emotion. Here is why you should try this style:
-
Blend your face with a stormy sky to share a mood on social media.
-
Turn a selfie into a moody indie album cover, a striking book jacket, or a video thumbnail.
-
An AI double-exposure tool skips the steep learning curve of complex software.
If you want art that feels poetic rather than literal, these double-exposure pics offer massive creative rewards for very little effort.
Click the picture to generate your exclusive windward sunset double exposure with one click👇
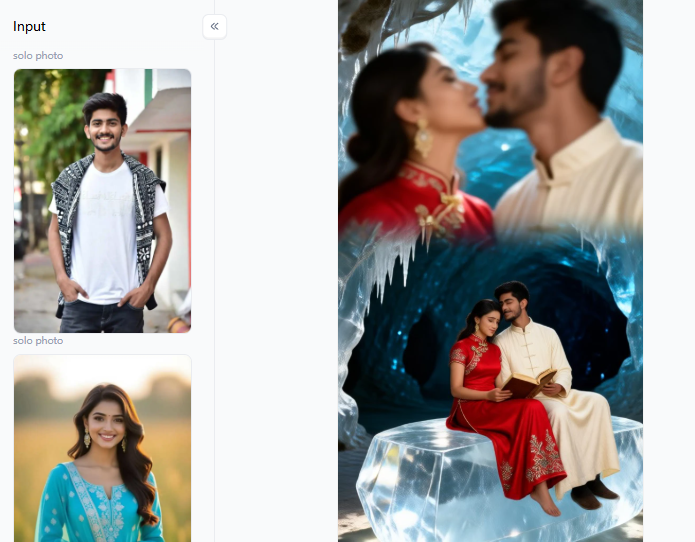
Key features of AI Double Exposure Portrait Generators
A good AI double-exposure portrait generator does much more than glue two photos together. It makes the different visual layers talk to each other. When you blend a human face with a dark, starry night, the model needs to know where the eyes belong and where the shadows should fall.
If you want to create stunning artwork without a headache, look for generators that offer these core features:
-
Fast Template Creation: Instead of staring at a blank screen, you can start with a pre-built style. You can pick a filter on a1.art, upload a selfie, or type a quick prompt; then, click “Generate.” This speedy process lets you test 10 different double exposure images in just a few minutes.
-
Smart Opacity Control: Have you ever seen double exposure pics that look like a dark, muddy puddle? That happens when opacity is handled poorly. The best tools let you adjust how much the background shines through your silhouette.
-
Beginner-Friendly Workflows: Skip weeks of learning confusing photo software. Simple menus and ready-to-use templates let anyone start immediately. This removes tech headaches, so you can focus on making great art.
-
Video and Image Flexibility: If you need a shifting cloud effect for a social media reel, you can build it. Plus, handy tools like a “Fork” button let you copy a cool style without typing long, complicated instructions.
A quality tool gives you freedom to experiment. By handling the difficult math of light and shadow behind the scenes, these features let you focus on telling a visual story.
Click the picture to generate your exclusive numb space with one click👇
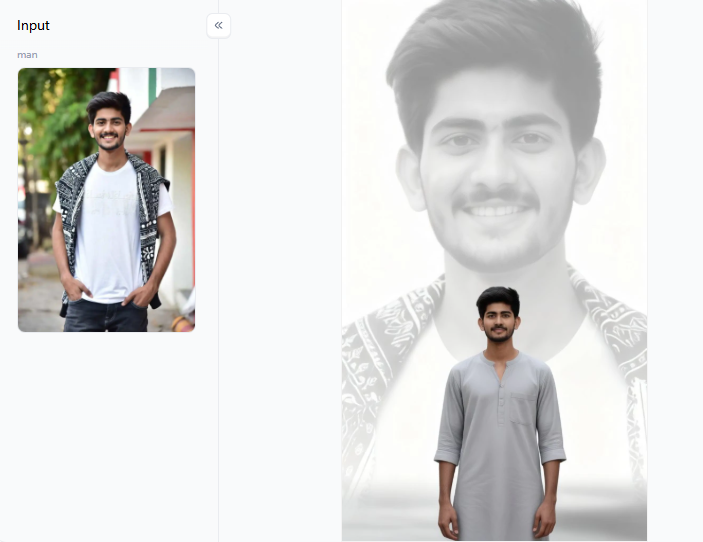
Blending Techniques and Opacity Management
A great double exposure feels bright and deliberate. You never want your two photos fighting for attention. Instead, they should work together to tell one story.
Blending acts like a slide projector shining light onto a wall. It naturally brightens the image, giving you an airy, vintage film vibe. If you try overlay, it punches up the contrast for a bold, graphic poster look. But be careful, because it can make your picture too dark.
To keep your art looking crisp, try these practical tips:
-
Start Dark: Use a clean, dark silhouette as your base. This acts like a container for your second image to show through.
-
Watch the Face: If the forest texture starts hiding your subject’s eyes, lower the opacity until the face is clear again.
-
Clean the Edges: Use digital masks, like an eraser, to remove parts of the overlay that spill outside your subject’s outline.
-
Use the 2/3 Rule: Give your main portrait 2/3 of the visual weight. Let the scenery take up the remaining third.
Pick one clear focal point, like a sharp jawline or a bright gaze. When you let your main portrait lead, your second layer will support it without overpowering the frame.
Click the picture to generate your exclusive still shadow with one click👇
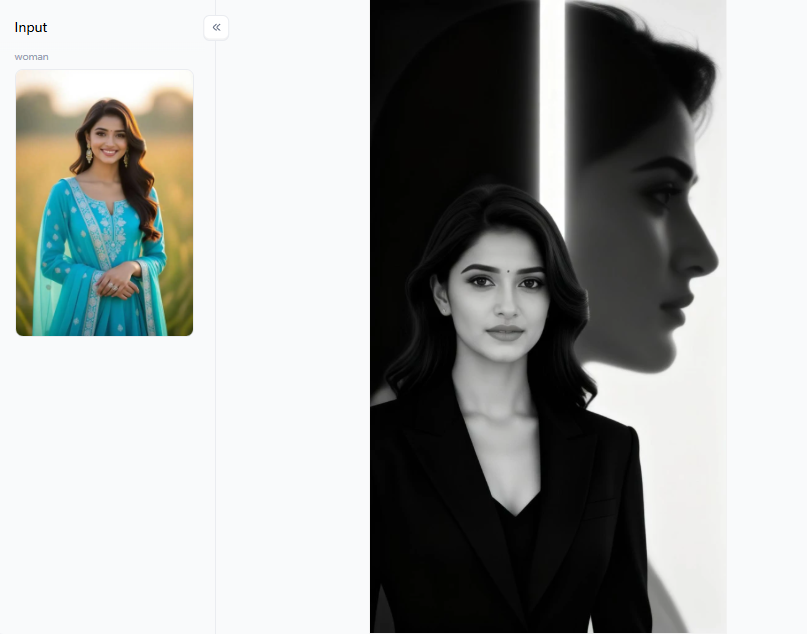
Color Grading for Cohesive Double Exposure Compositions
Color grading makes or breaks your art. If you stack two photos, they often look awkwardly glued together. You need to unify their colors to fix this.
First, choose an emotional direction. A cool blue-gray gives a cinematic, misty vibe, while warm golden amber feels like a nostalgic summer evening. Filters featuring lush foliage create a quiet, natural beauty.
Follow these practical blending rules:
-
Match Highlights: Match the brightest spots across both layers.
-
Lower Saturation: Dial down the color intensity if the images clash.
-
Tint Shadows: Add one soft color to the dark areas to tie the pictures together.
-
Protect Skin: Keep human faces looking natural, even in fantasy scenes.
-
Pick a Hero Color: Let just one bright accent color stand out.
By making simple color choices, your final image will look like one seamless scene.
Click the picture to generate your exclusive dark silence with one click👇
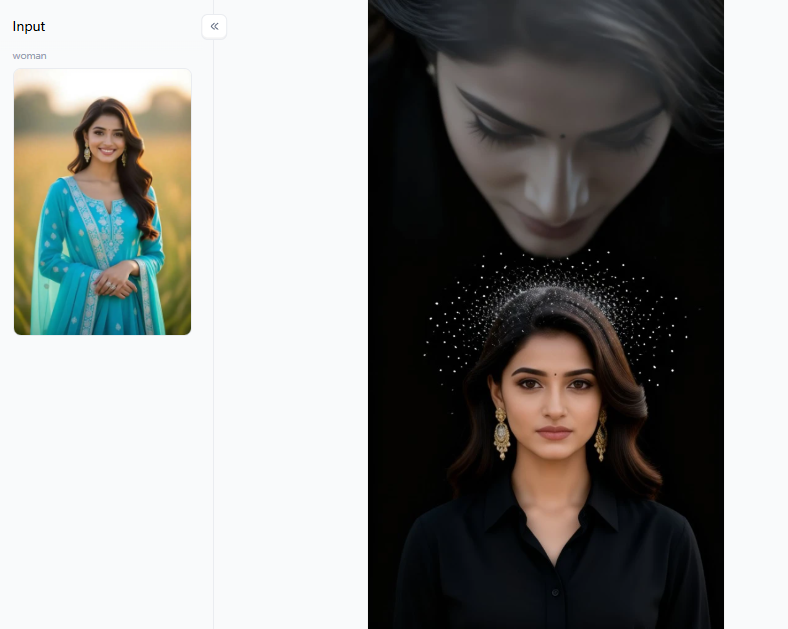
Creative Double Exposure Variations and Commercial Uses
The beauty of this art style is how easily it adapts. It survives fast-moving digital trends because you can make it feel soft, moody, or intensely athletic. Depending on your creative goal, you can change the vibe with a single filter.
Here are a few ways to apply different styles to your projects:
-
Personal Portraits: Use Double Exposure & Double Silhouette, Double Exposure Photography, or Cloud Swing Double Exposure. These options are perfect for dreamy profile pictures or a poetic double exposure portrait.
-
Action and Streetwear: Try the Double Exposure Windbreaker Man or Motorcycle Man Double Exposure. These inject raw movement and intimate energy into music visuals or fashion banners.
-
Fitness and Strength: The Double Exposure: Muscle Photography style uses the human body as a rugged canvas. It is effective for gym branding and athletic posters.
-
Nature and Calm: Filters like Ginkgo Rain Double Exposure, and Green Double Exposure blend soft weather and falling leaves. They offer a quiet, gallery-like finish.
You can apply these exact methods to design striking album covers, engaging travel campaigns, wellness brand graphics, or eye-catching video thumbnails.
Click the picture to generate your exclusive soft memory with one click👇
Turn Your Photo into Stunning Double Exposure Art with a1.art
Creating beautiful art requires a careful balance between speed and control. Generic AI tools give you freedom, but they usually demand complex instructions and heavy manual cleanup.
In contrast, template-led platforms like a1.art skip the hard work. You choose a filter, upload your picture, and instantly generate your double exposure images. Plus, you can turn a static photo into a moving video loop for social media.
To get the best results, always pair a high-contrast photo with a highly specific prompt. Try copying these vivid ideas:
-
Nature: A clean side-profile portrait filled with a foggy pine forest, soft morning light, and a muted green grade.
-
Urban: A moody profile blended with rainy neon city streets, cool magenta reflections, and a crisp jawline silhouette.
-
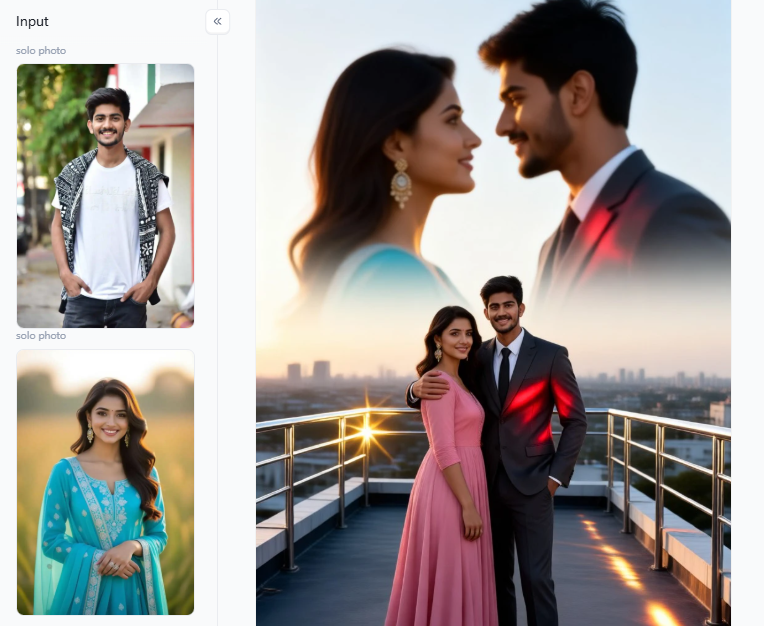
Romantic: A couple’s silhouette, filled with cherry blossoms, a soft pink haze, and a dreamy wedding-poster glow.
-
Fitness: An athlete’s silhouette filled with dark gym lights and cracked earth, featuring sharp, dramatic contrast.
Even with amazing prompts, digital errors happen. Users frequently complain online when a face vanishes or the final blend turns out too dark. Treat small distortion fixes, like tweaking the opacity slider, as a normal step in your process, not an afterthought.
Furthermore, you must protect your digital privacy. Before you create a double-exposure photo, read the platform’s terms carefully. Never upload sensitive images, and always ask for permission before using someone else’s face.
Click the picture to generate your exclusive skyline neon pulse with one click👇
Bottom Line
Using an AI double exposure portrait generator is the smartest choice when you want layered, emotional art without the heavy lifting. To achieve that scroll-stopping look, always start with a sharp silhouette and pay close attention to your light. By combining smart, ready-made templates with a few quick opacity tweaks, you can craft a deeply personal masterpiece that demands attention.
FAQs
Q: What does a double-exposure photo look like?
A double-exposure photo combines two images into a single one. Originally a film trick, it fills a dark human outline with textures like trees or water. The face stays clear, while the background adds emotion. Platforms like a1.art use smart filters to balance these layers, keeping your identity the main focus.
Q: How to make a double exposure photo?
To make a double exposure photo, start with a dark side profile against a white wall. Next, add a bright background layer. Traditionally, you adjust opacity settings in software. For a much faster solution, upload your selfie to a1.art. Its pre-built templates balance the light and shadows for you in seconds.
Q: What is the 2/3 rule for double exposure pictures?
This rule for double exposure pictures is a proven design standard. It states that your main subject should carry 2/3 of the visual weight, while the background should carry the remaining third. This keeps the artwork clean. If you struggle with this balance, smart filters apply this ratio to keep your face from getting lost in the background.
Q: What types of images work best for double exposure AI effects?
For the best AI double-exposure effects, use a crisp side-profile shot against a plain background. For your second image, pick large, simple textures. Pine forests, big clouds, or ocean waves work better than busy city streets. Platforms like a1.art provide high-quality nature overlays that fit these human shapes.
Q: Can I customize the double exposure style?
Yes, you can customize the style. Professional editors adjust blending modes to change the mood from a soft sunset to a dark street. On a1.art, you can use the helpful “Fork” button to tweak layer opacity and text prompts. This gives you total control to match your personal social media vibe.
Read more
- How to Create Krishna Janmashtami AI Images Online in 2026?
- How to Generate a Blackwhiplash AI Art Style Image?
- Creating HUT RI 81 Twibbons with a Free AI Editor: The Ultimate Guide to Viral Independence Day Art
- AI Royal Portrait Generator: Rule Your Photos as a King or Queen
- Top 30 SeaArt AI Prompts for Better AI Image Generation
- Best Dessi Undress AI Alternatives for Safe Photo Editing in 2026
- Best Facesitting AI Alternatives 2026: Top 8 Ranked & Tested
- Create Perfect ID Photos with the AI Admission Photo Generator
- Top 10 Free Deepfake Nude Generators in 2026: Explore AI Nude Art
- AI Image to Video NSFW Generator: The Best Tools for Animating Adult Images
Written by

a1.art
Published on
Aug 5, 2026
Share article


